Hello friends!
It’s one of my favorite times of the month — the second Wednesday of each month I team up with a bunch of my blogging friends for a fun challenge! Each time, we begin with the same theme or item and it’s so fun to see what each of us comes up with!

This month, I am so excited to be working with Royal Design Stencils and using one of their stencils on any surface in our home! Thanks so much to Royal Design for sponsoring us this month!! All opinions about these amazing stencils are all my own!
I could not be happier with my first ever attempt at stenciling and how it turned out!!!
This post contains affiliate links. Please see my full disclosure here.
Ever since completing our One Room Challenge last month, I’ve been trying to decide which room we’ll take on in the fall. And this room totally ran through my mind as one of my options but I quickly thought “why wait till then??” Why not start updating it now!?
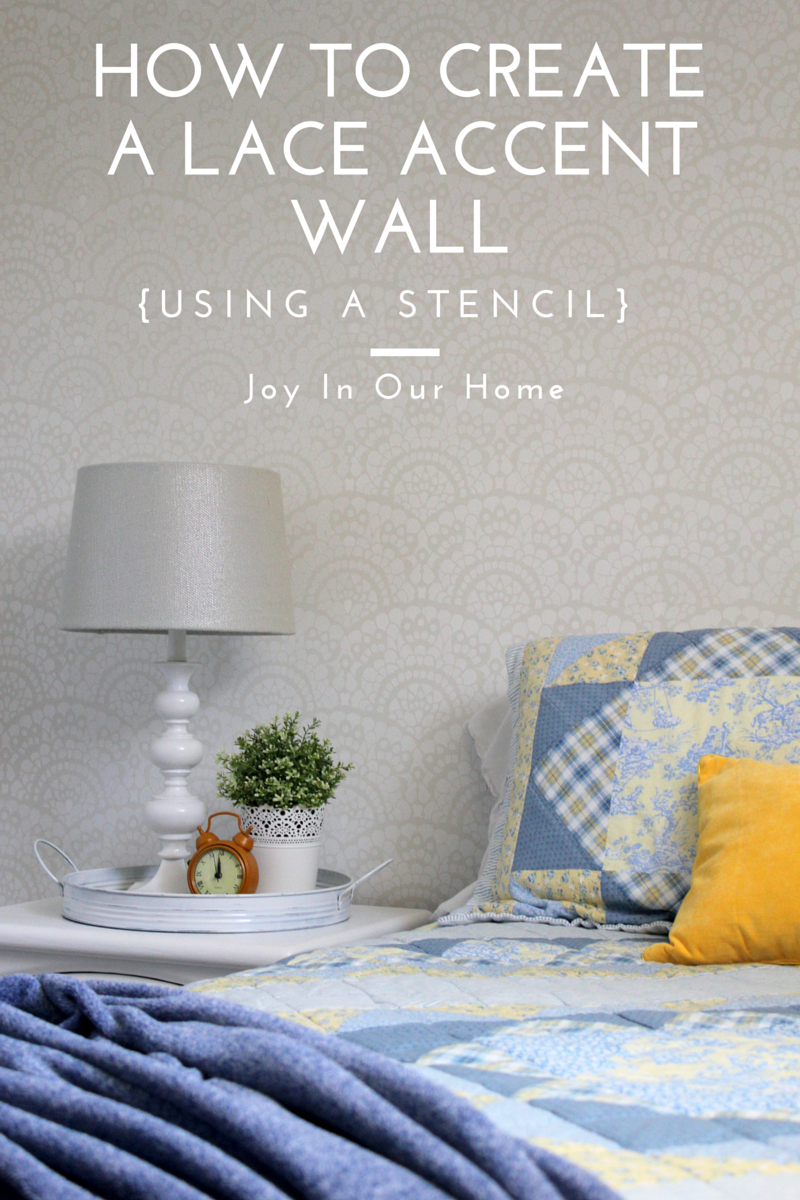
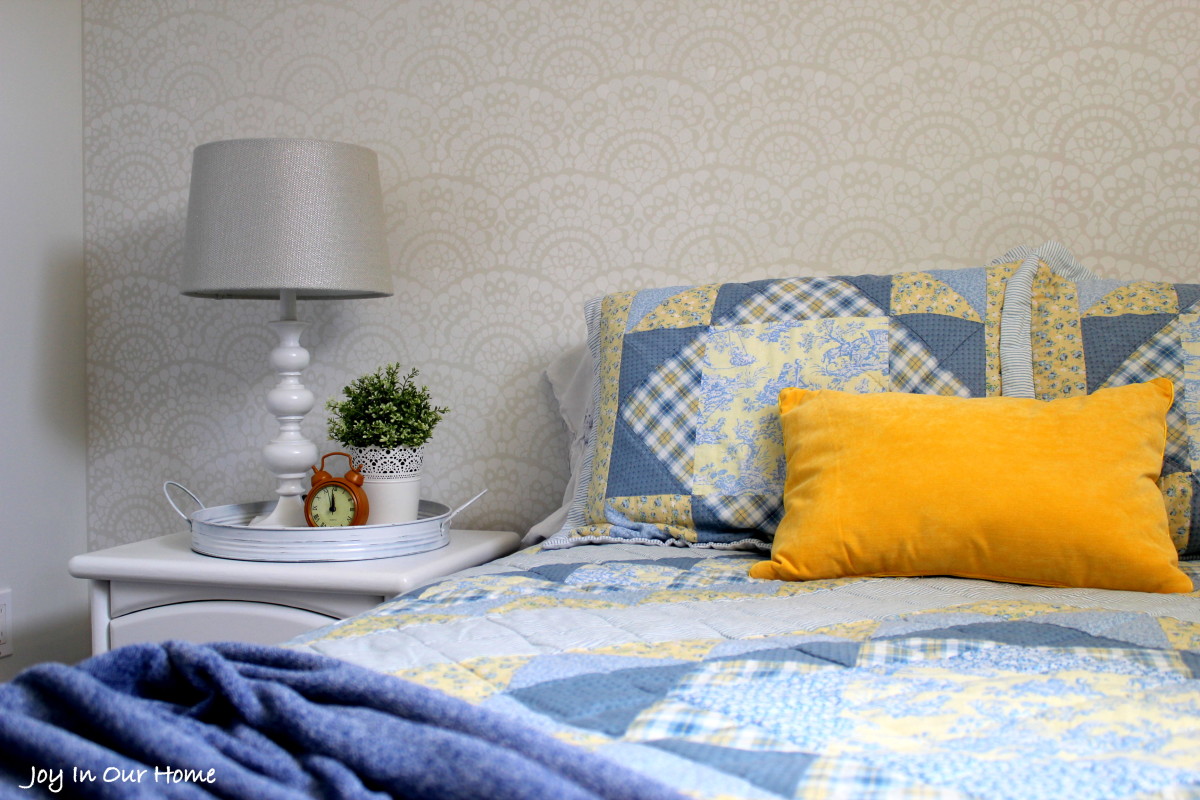
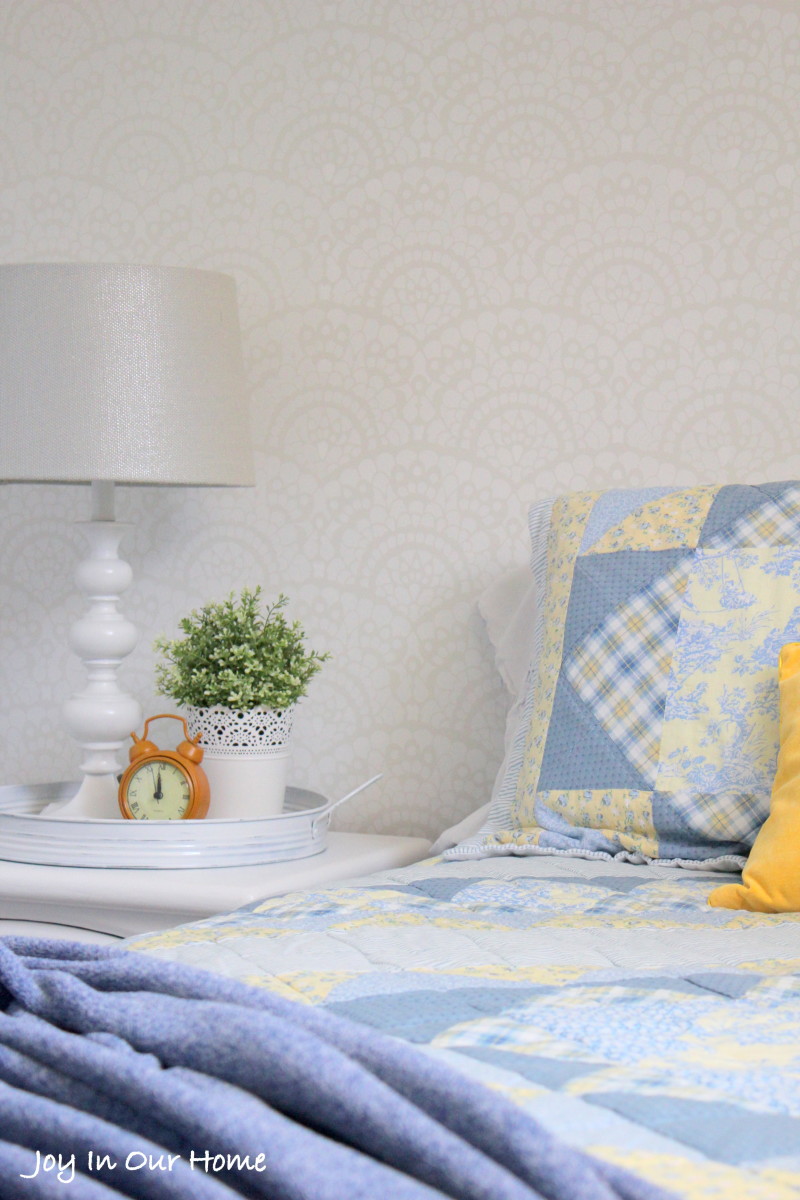
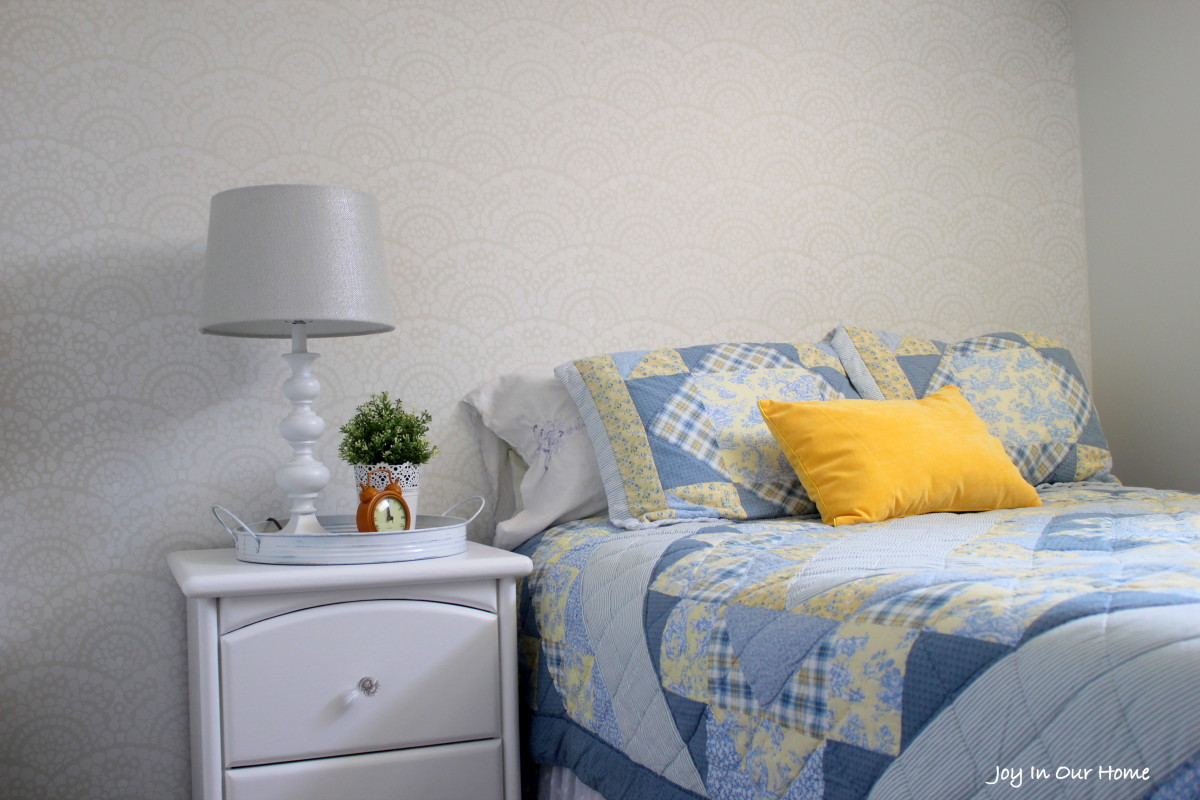
So, when the opportunity arose to work with Royal Design Stencils our guest bedroom instantly came to mind! I knew right away that a stencil design on the main wall would look beautiful! The only hard part was choosing which design… there are soo many beautiful choices I wondered how I’d ever be able to narrow it down to one! I finally decided on the Spanish Lace Wall Stencil and I’m so glad I went with it!
Here’s what our guest bedroom looked like before…
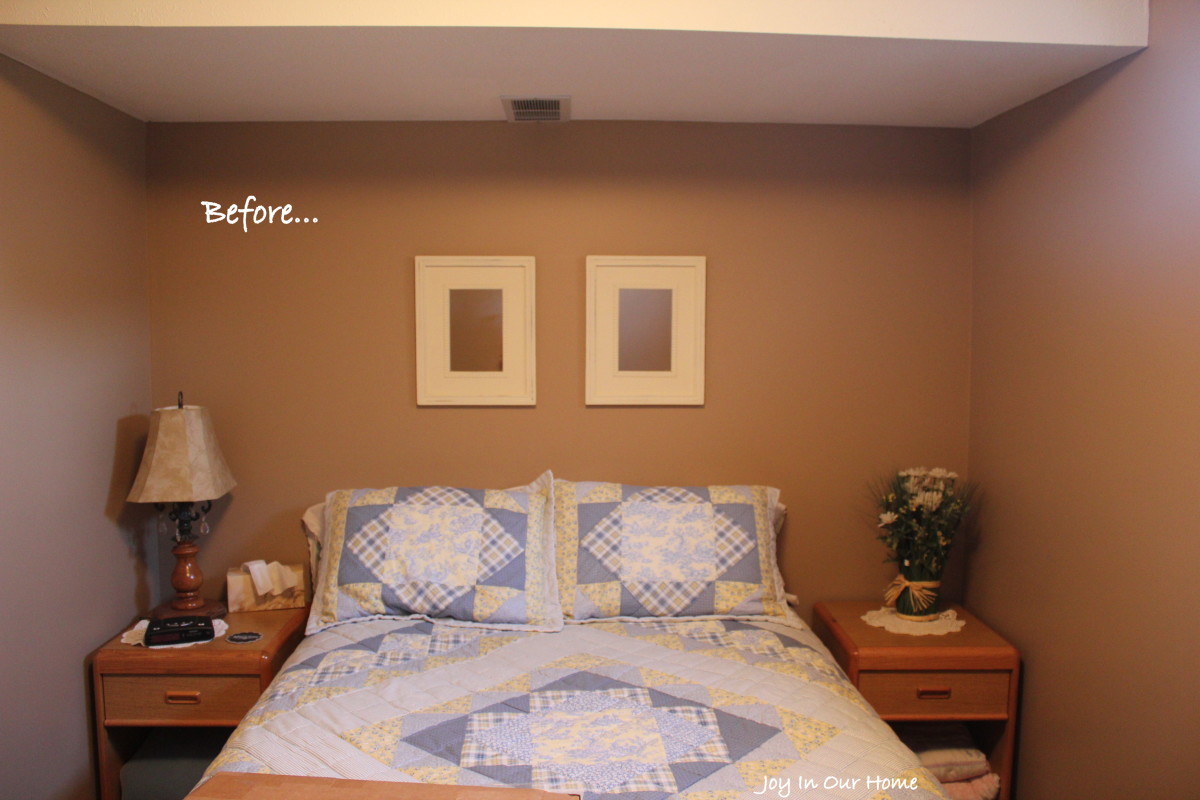
We painted our basement a few years ago when beige was the whole cheese!! I cannot begin to tell you how bright and pretty it looks now that we painted it a very, very light grey! I’m also in the process of repainting those end tables and will share them soon!
Here’s what I used to make a “Lace Stenciled Wall”:
- paint (for the background wall)
- paint for the accent color (I used white)
- Spanish Lace stencil
- full sized roller and small sized roller
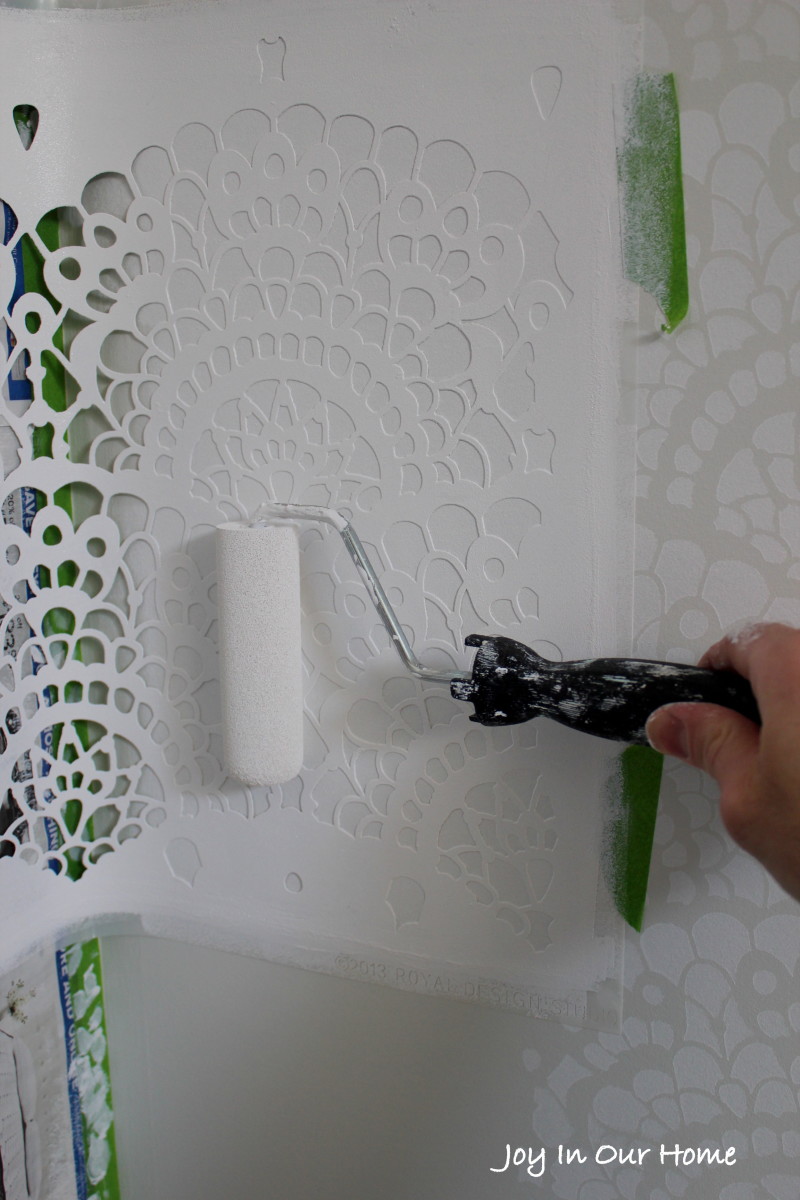
That’s it! No fancy, shmancy items that you’ll never use again! The first thing I did was the normal painting prep work… remove all plug in and light switch covers and cover any flooring or furniture from paint splatters that may occur. Using a full sized roller, I painted the walls two coats of light grey. After they were dry, the stenciling begins!
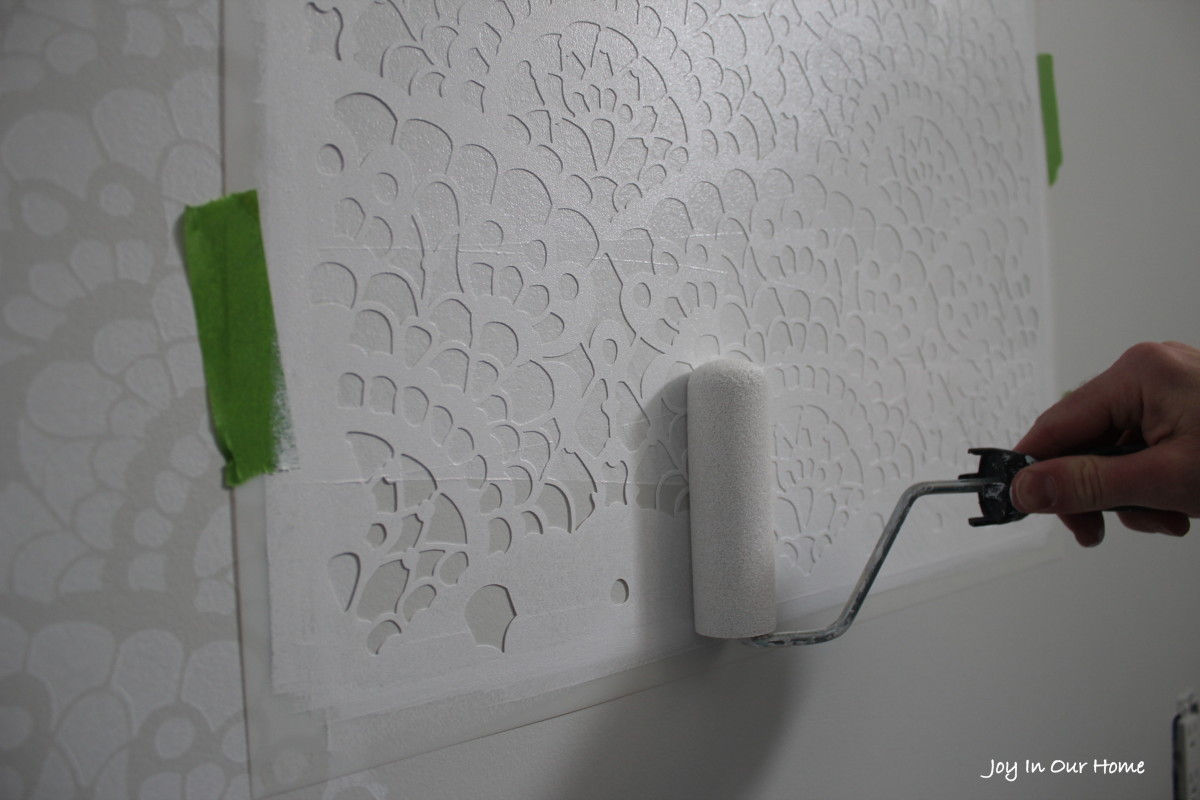
I think one of the biggest questions about stenciling a full wall is where to begin? That will depend on your stencil design and length of wall. We chose to start at the top of the ceiling and work our way to both sides. I used my favorite Frog Tape to hold my stencil in place. Using a small sized roller, roll it in paint in your tray but then roll all the access paint off. Do this until you have barely any paint left on your roller. That’ll be the perfect amount then! I then rolled from top to bottom and side to side onto my stencil. I immediately removed the stencil, added new tape and attached to the wall again. I won’t include directions here about how to line the stencil up because those directions are included when you purchase your stencil and they worked great!
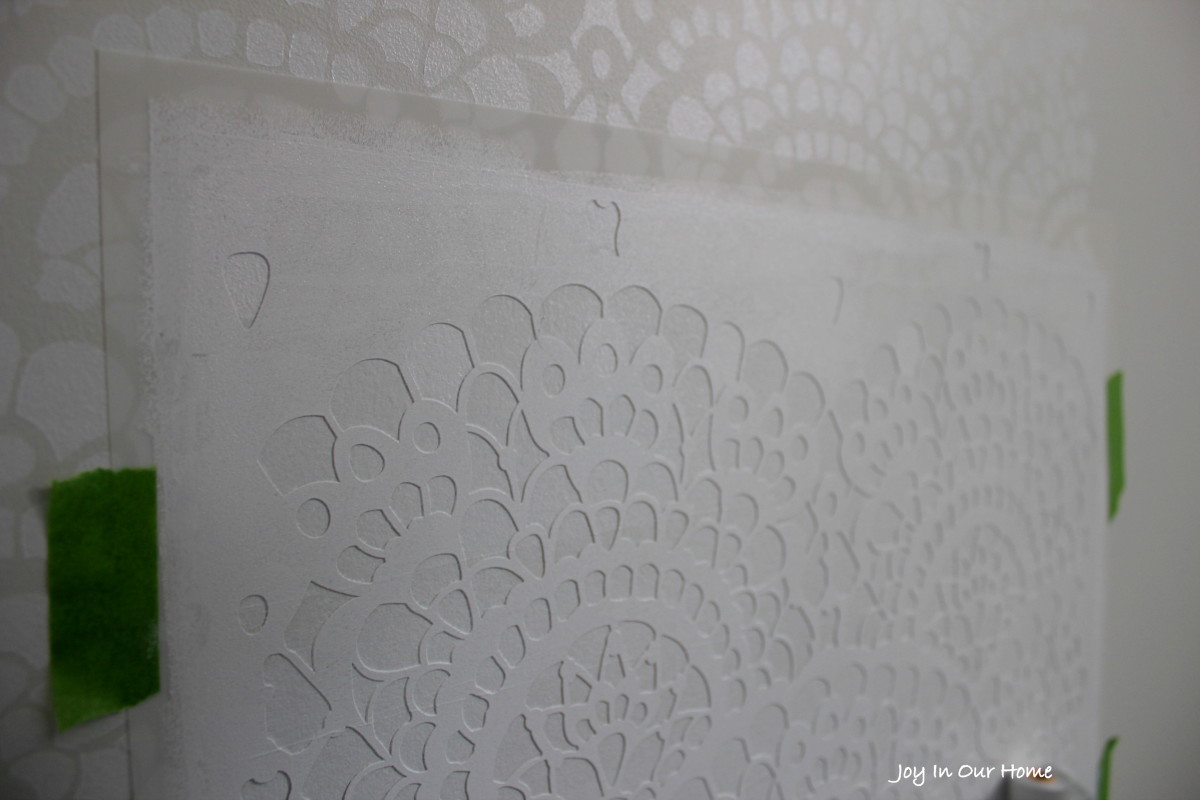
Once you get the hang of it, it moves along quickly!
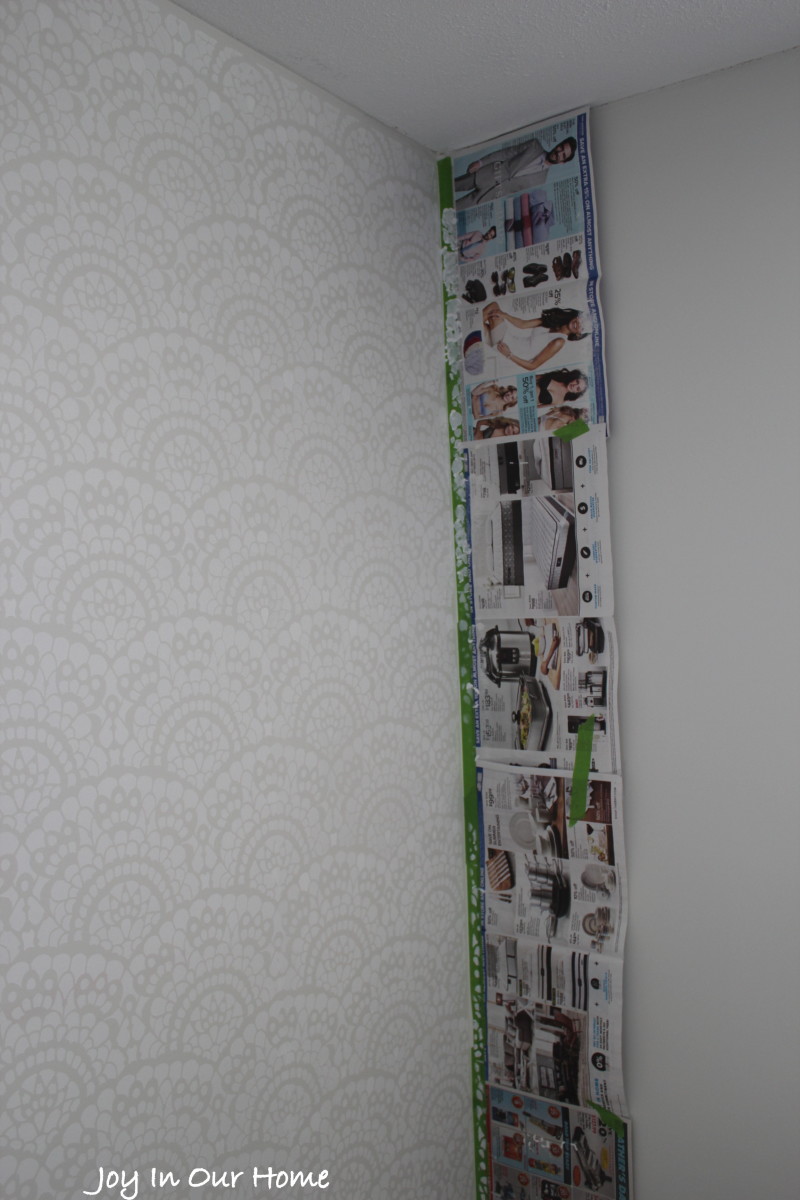
The wall on the right of the picture wasn’t going to be stenciled so I used newspapers to cover it from splatters. It also works great because as you get close to the corner you can curl the stencil into the corner and onto the newspaper and not worry about getting your wall messy!
From start to finish the stenciling took two hours to complete! To be honest, I was very nervous before starting but now I want to stencil another wall in our home!! I love how it turned out!!
It was soo fun to see all the amazing stenciling projects that my friends came up with! From walls to furniture and everything in between, you’ve got to check them out! Just follow the links below to each of their sites!
Thanks so much for stopping by today!
-Kendra
